This guide explains how to integrate Okta as an identity provider (IdP) for Oxide via SCIM v2.0. It assumes you have an Okta administrator account and access to the Oxide Console with fleet admin privileges.
You may follow the steps exactly as listed below or perform most of the Okta-side setup first, complete Oxide setup, and return to Okta to configure the API integration. Either way, it is best to assign groups and users in the Okta app only after you have completed the API integration settings; otherwise, you may find that existing group members are not auto-imported into Oxide and only new members are pushed.
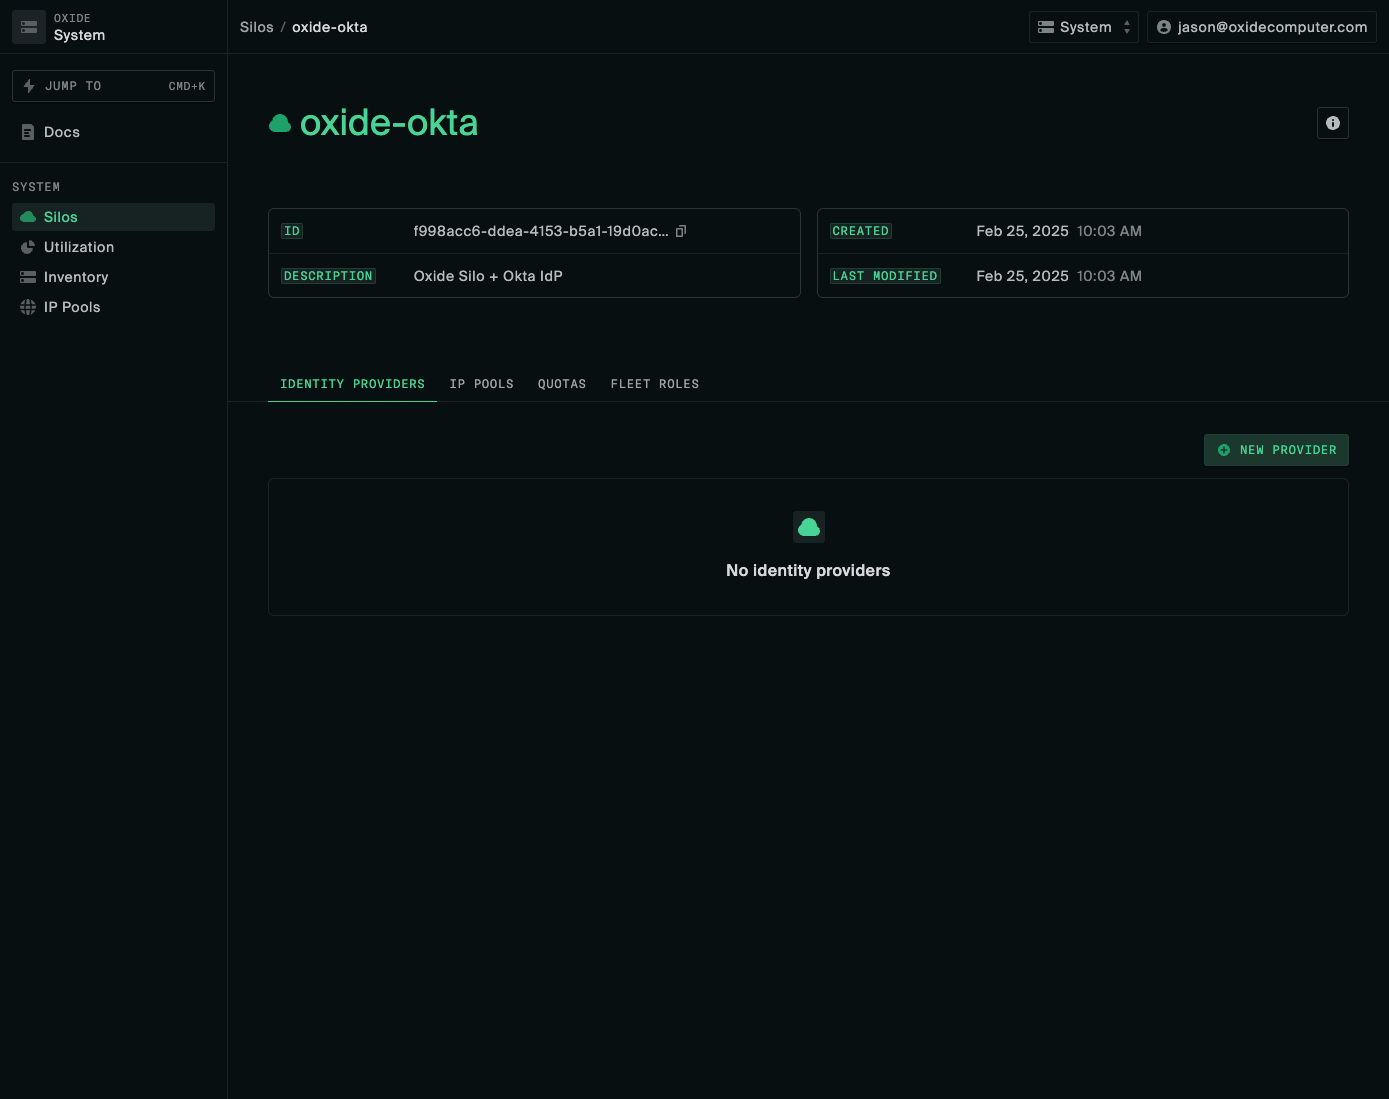
Create Silo in Oxide
In the Oxide Console:
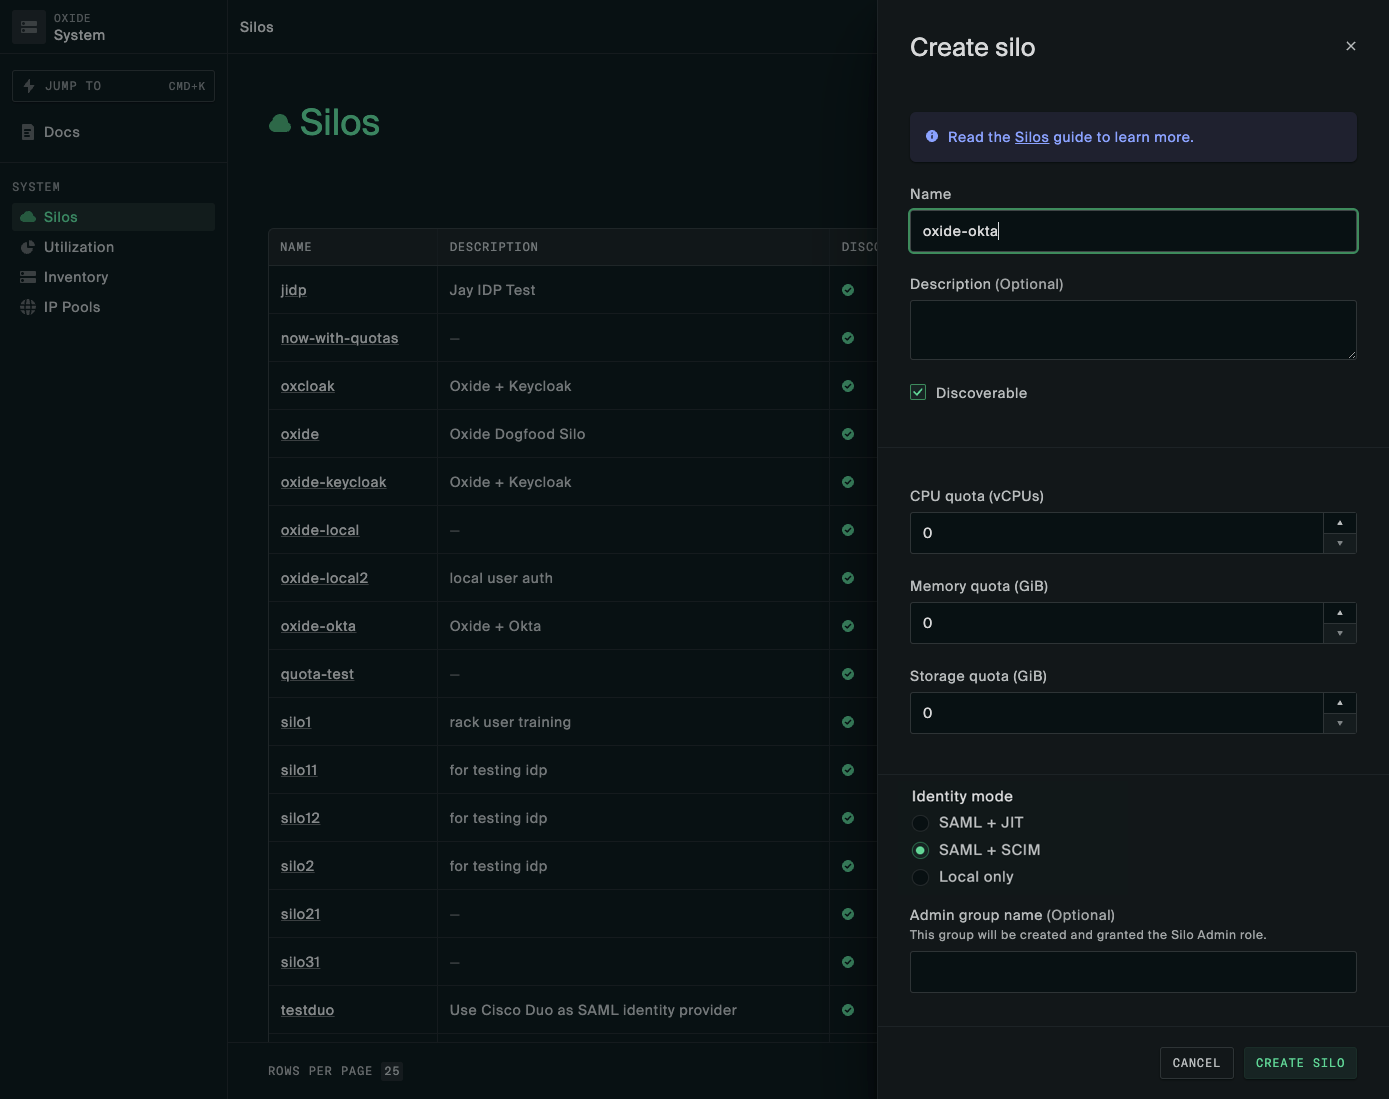
Go to System > Silos and create a new silo.
Enter name and description.
Select "SAML + SCIM" for identity mode.
Add a TLS certificate matching the silo FQDN.
Next, on the SCIM tab, generate an initial API token to be used to provision the admin group and users in the group. (Silo admin will be able to rotate the bearer tokens at a later time if desired.)
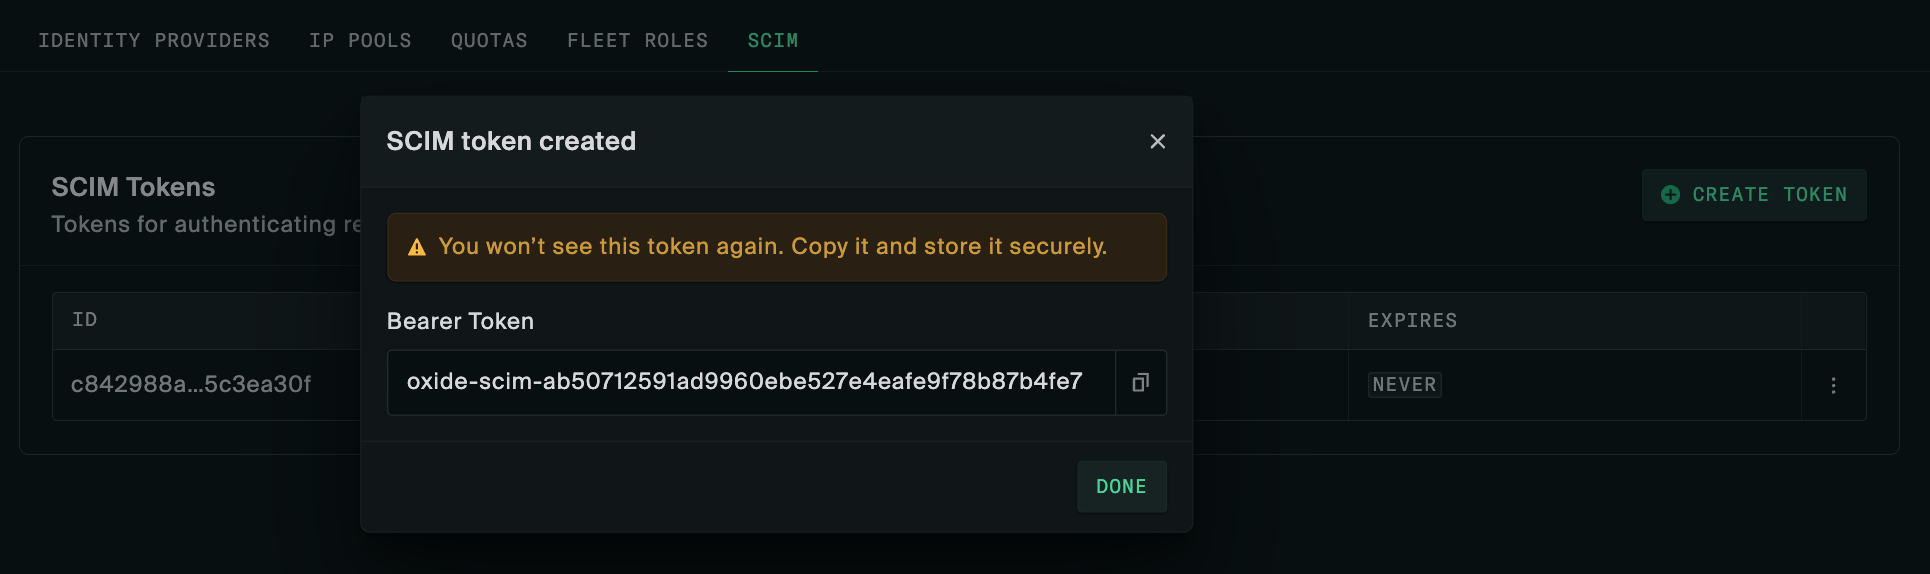
Ensure you capture the token as it is not retrievable afterwards. In case it is not stored for some reason, you can always generate a new one.
Set up Okta SCIM 2.0 Application
The Okta-side setup follows the steps described in this Okta guide The specific input used for integrating with Oxide is highlighted so that the required configurations can be achieved even when there are minor changes in Okta’s user interface between different versions.
Create a SCIM 2.0 app
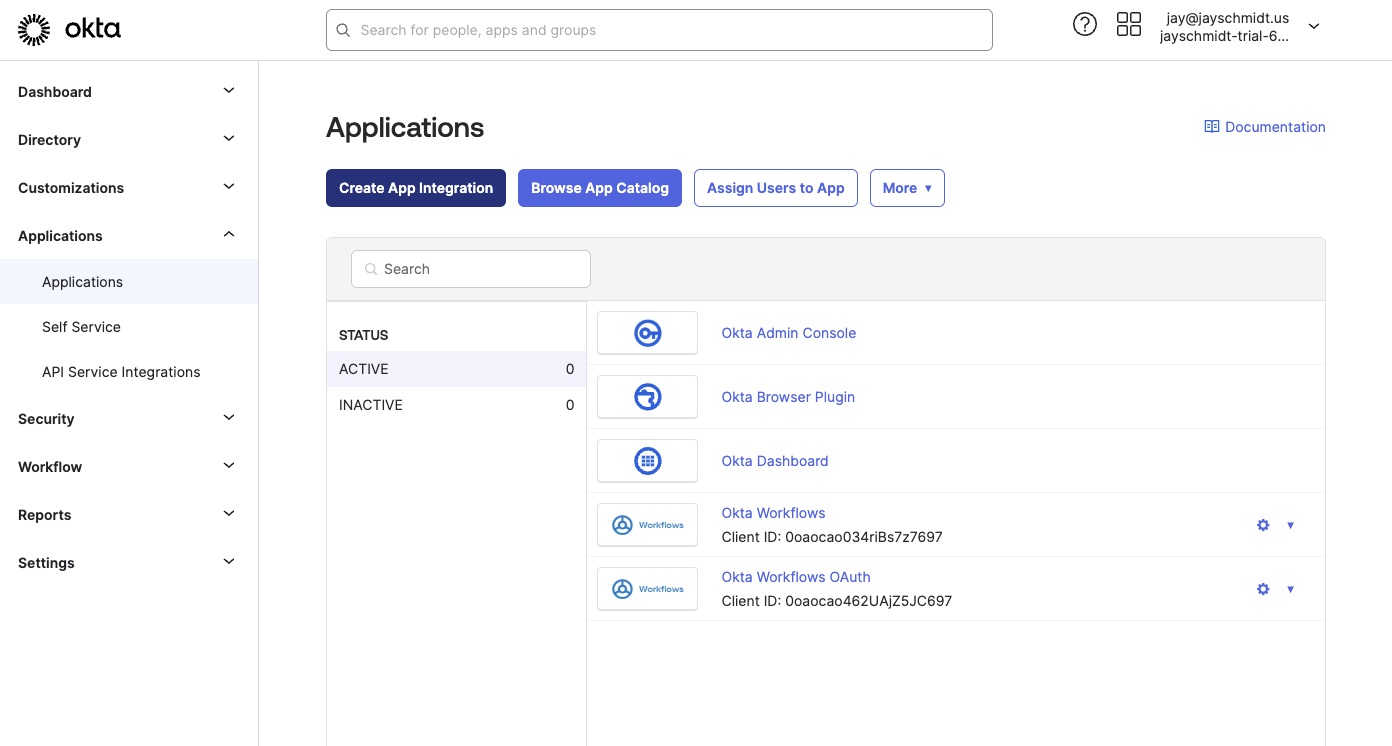
Log in to the Okta Admin Console.
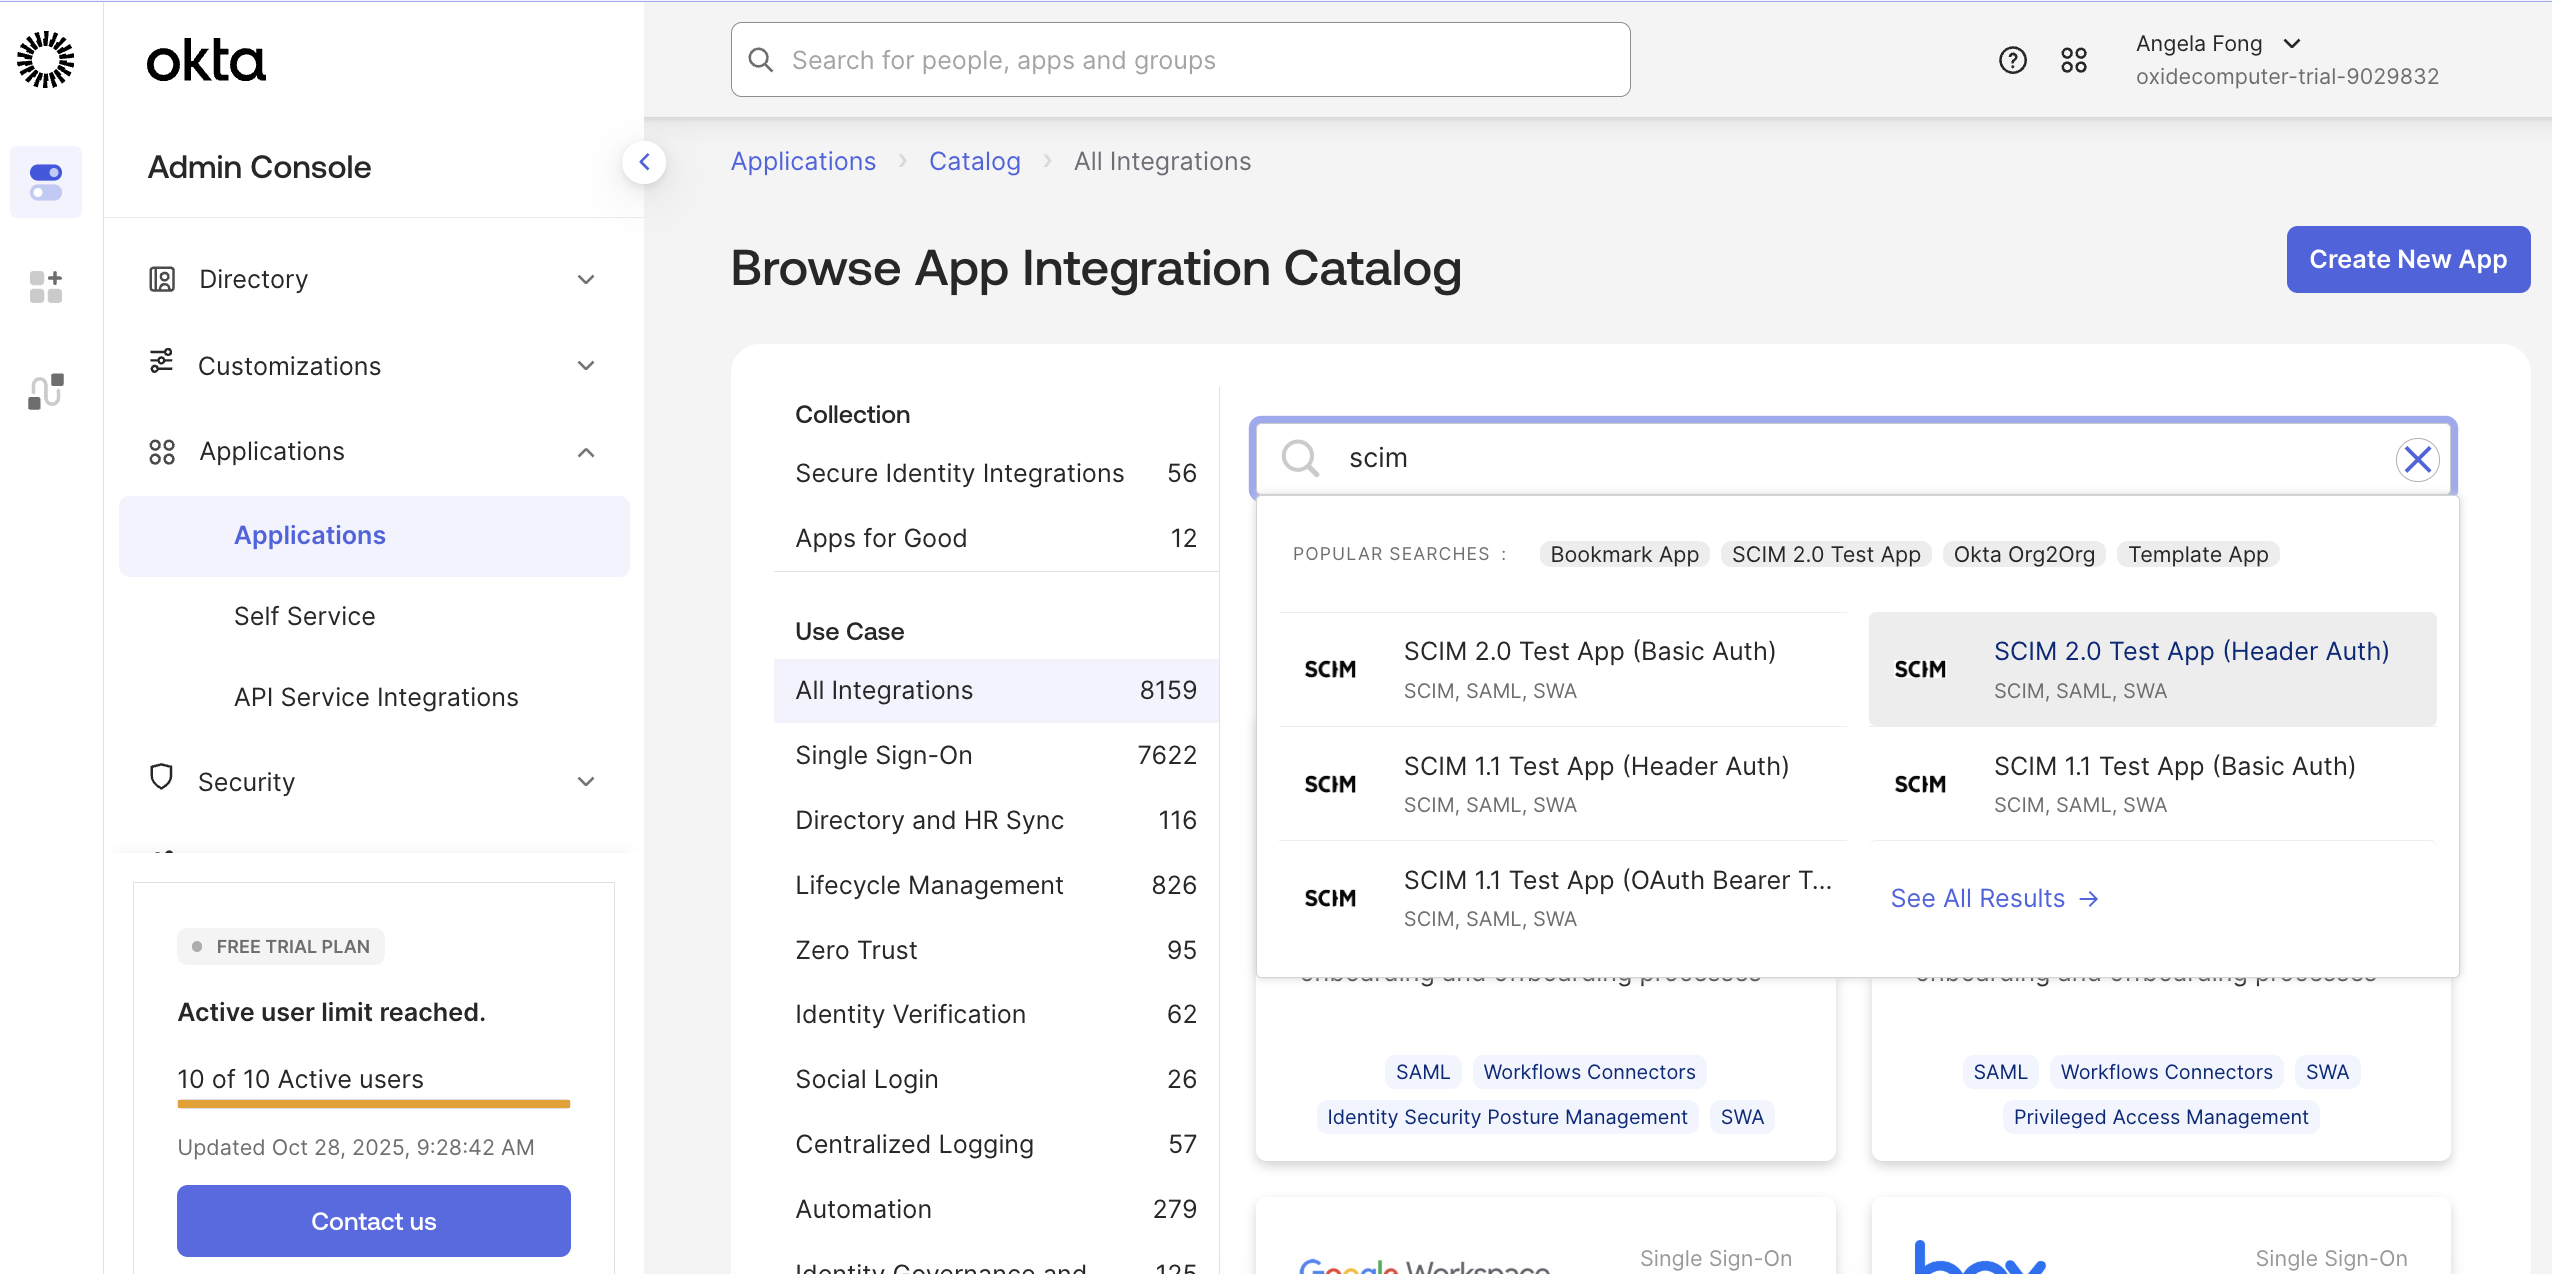
Navigate to Applications, click Browse App Catalog.
Select SCIM 2.0 Test App(Header Auth) to create a new app.
Choose SAML 2.0 for Sign-in method.
Configure Sign-on Options
Under advanced settings:
Set both Login URL and ACS URL to:
https://$siloName.sys.$oxideDomainName/login/$siloName/saml/$providerName
For simplicity, "okta" is used in this guide as the
$providerName. If you prefer a different name, ensure you use the same name when creating the Oxide silo identity provider in a later step.Set the Audience URI (SP Entity ID) to
$siloName- same as the one in the ACS URL.Specify the Name ID format and Application Username as needed.
Configure Provisioning
On the Provisioning tab, enable API integration.
Set the Base URL to:
https://$siloName.sys.$oxideDomainName/scim/v2
Set the API Token to:
Bearer $token
Select the Import Groups checkbox
Additionally, enable the following Provisioning to App options:
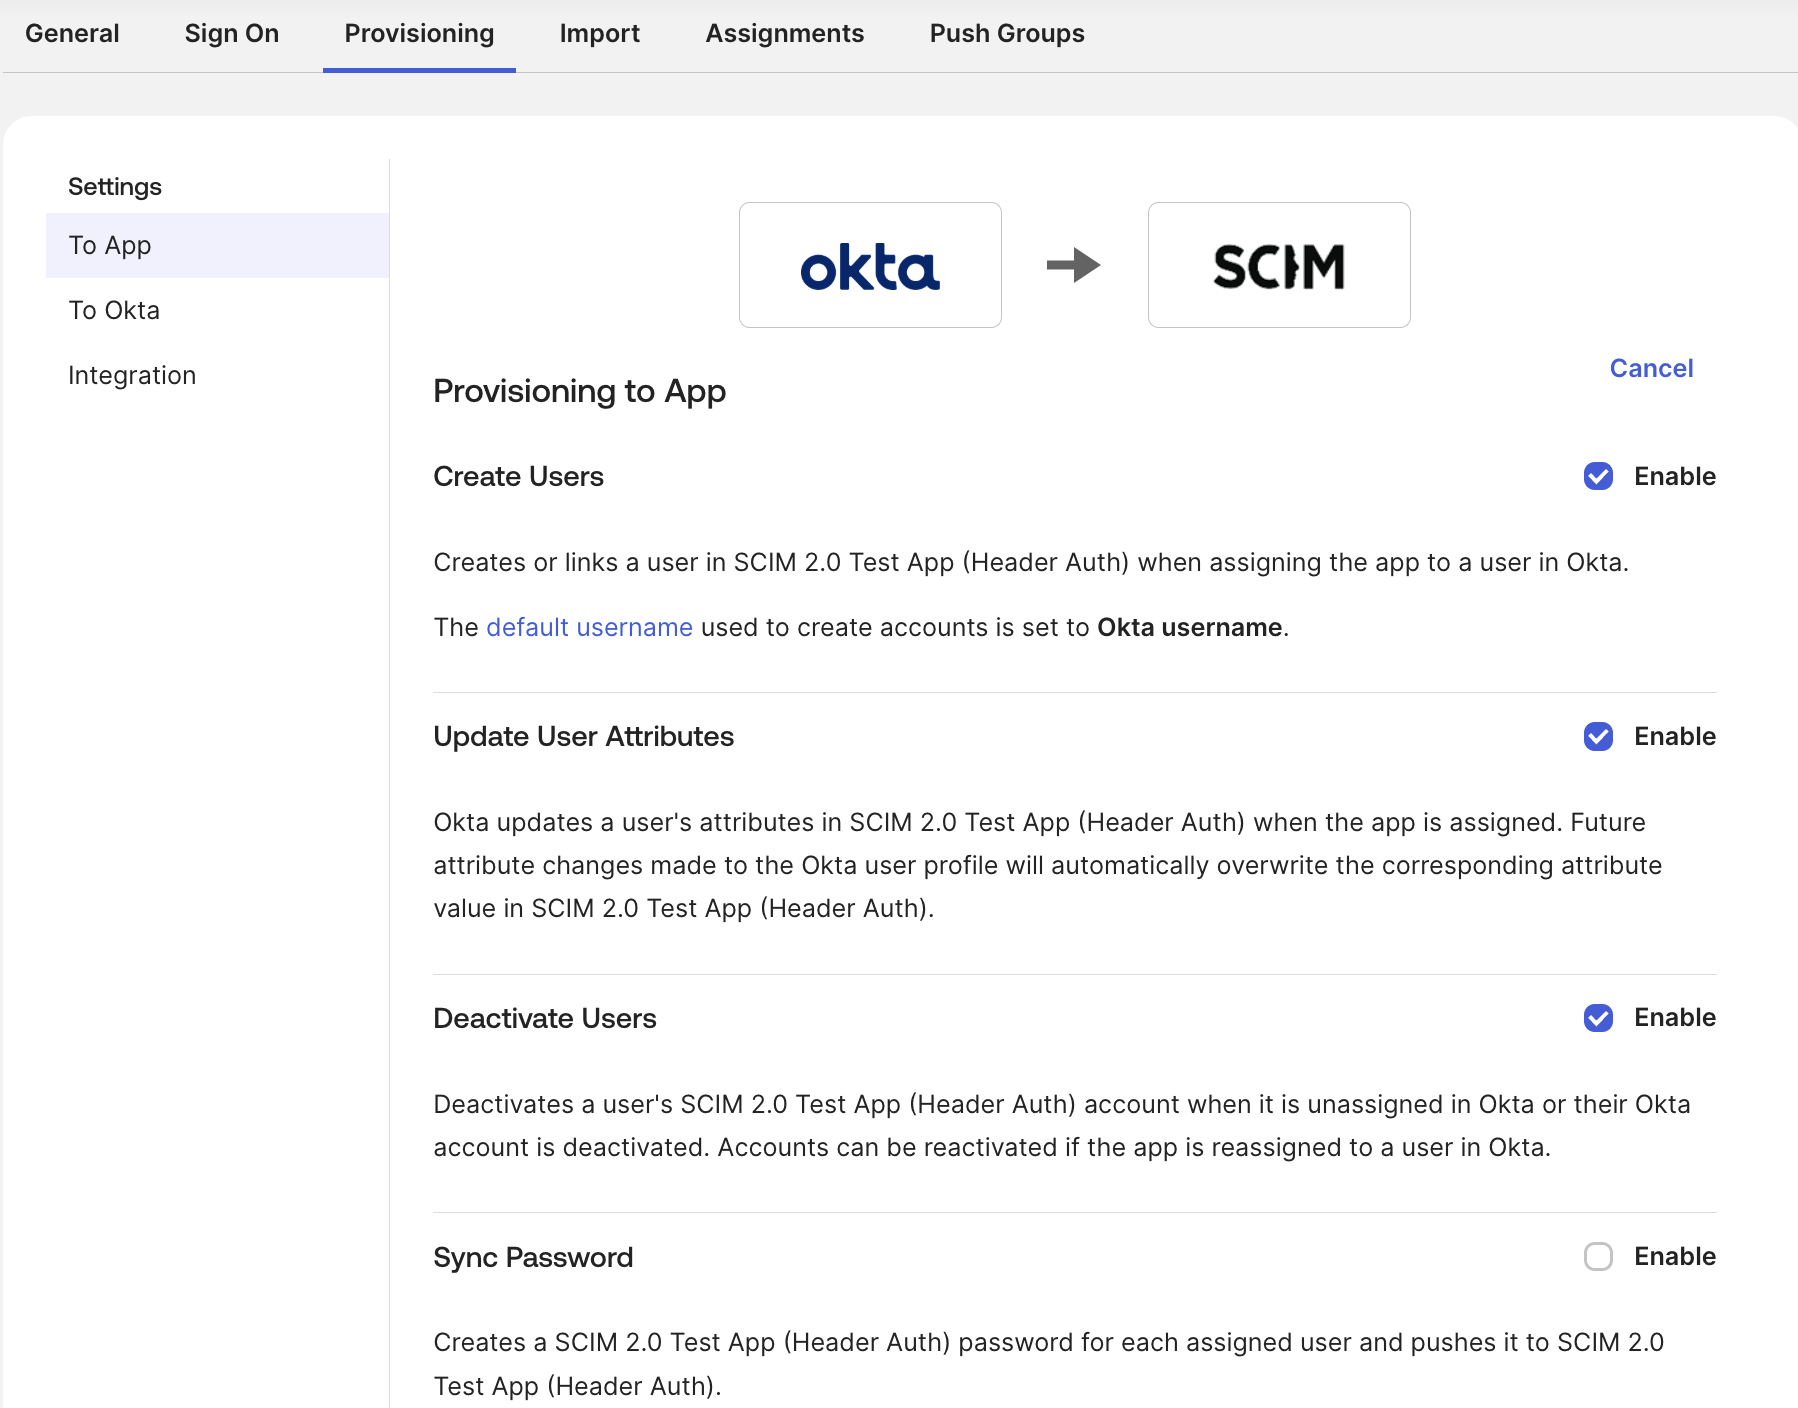
Assign Users and Groups
Assign users and/or groups to the Oxide app.
Push Groups
Select the groups to be imported into Oxide. Once the push status becomes
"Active", you can see the groups and their members in Oxide via /scim/v2/
GET requests. The Oxide identifiers of users are captured in the id
attribute that can be referenced when granting silo admin access via the
Silo IAM Policy Update API.
Find Metadata URL
Copy the Metadata URL from the General tab. This will be used to configure the Oxide IdP.
Configure Oxide Silo Identity Provider
Back on the Oxide Console or API client, create an identity provider for the silo.
If you are using the UI, on the silo’s Identity Provider tab, click New Provider.
| Field | Okta Value |
|---|---|
Provider Name | "okta" or another descriptive name |
Service provider client ID | Silo name (same as in Okta) |
Entity ID |
|
ACS URL | Auto-generated by Oxide
|
Group attribute name | (not used) |
Metadata source | Use the Metadata URL downloaded from Okta |
Cert/Key files | Provide if using request signing (in DER format) |
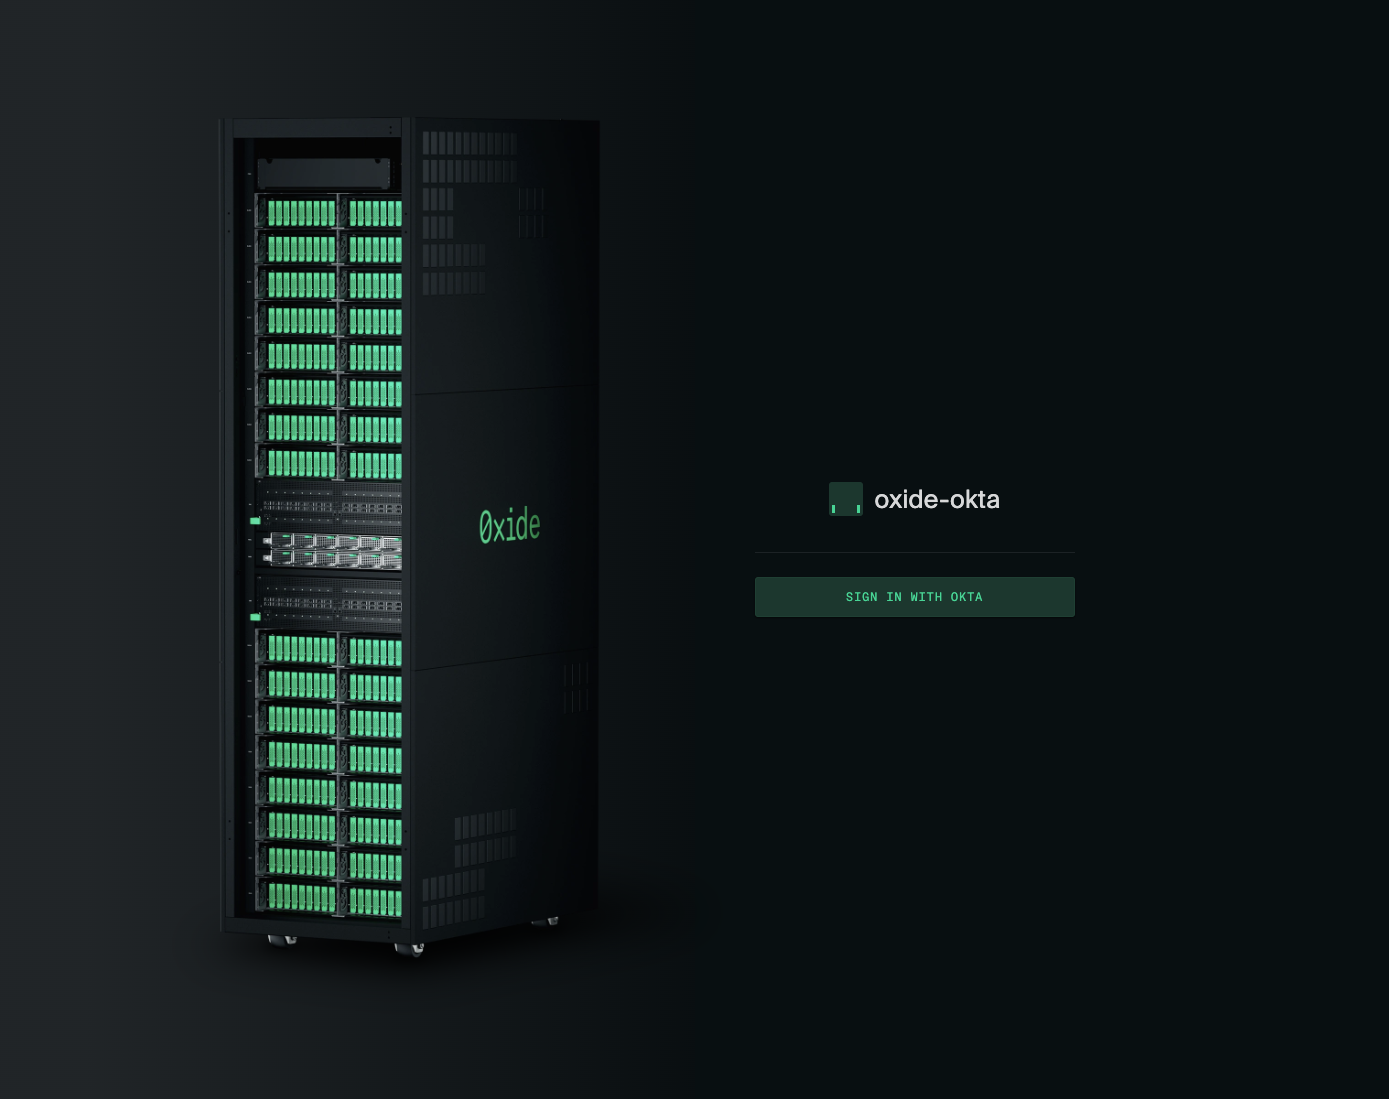
Log in to Oxide
After configuration, log in to your Oxide Silo using the Okta SSO button.
User Groups and Access in Oxide
Silo admins can modify the group and user access in their silos at any time. They can also create and delete bearer tokens. Any change in the bearer token must be applied to the Okta app integration settings.